



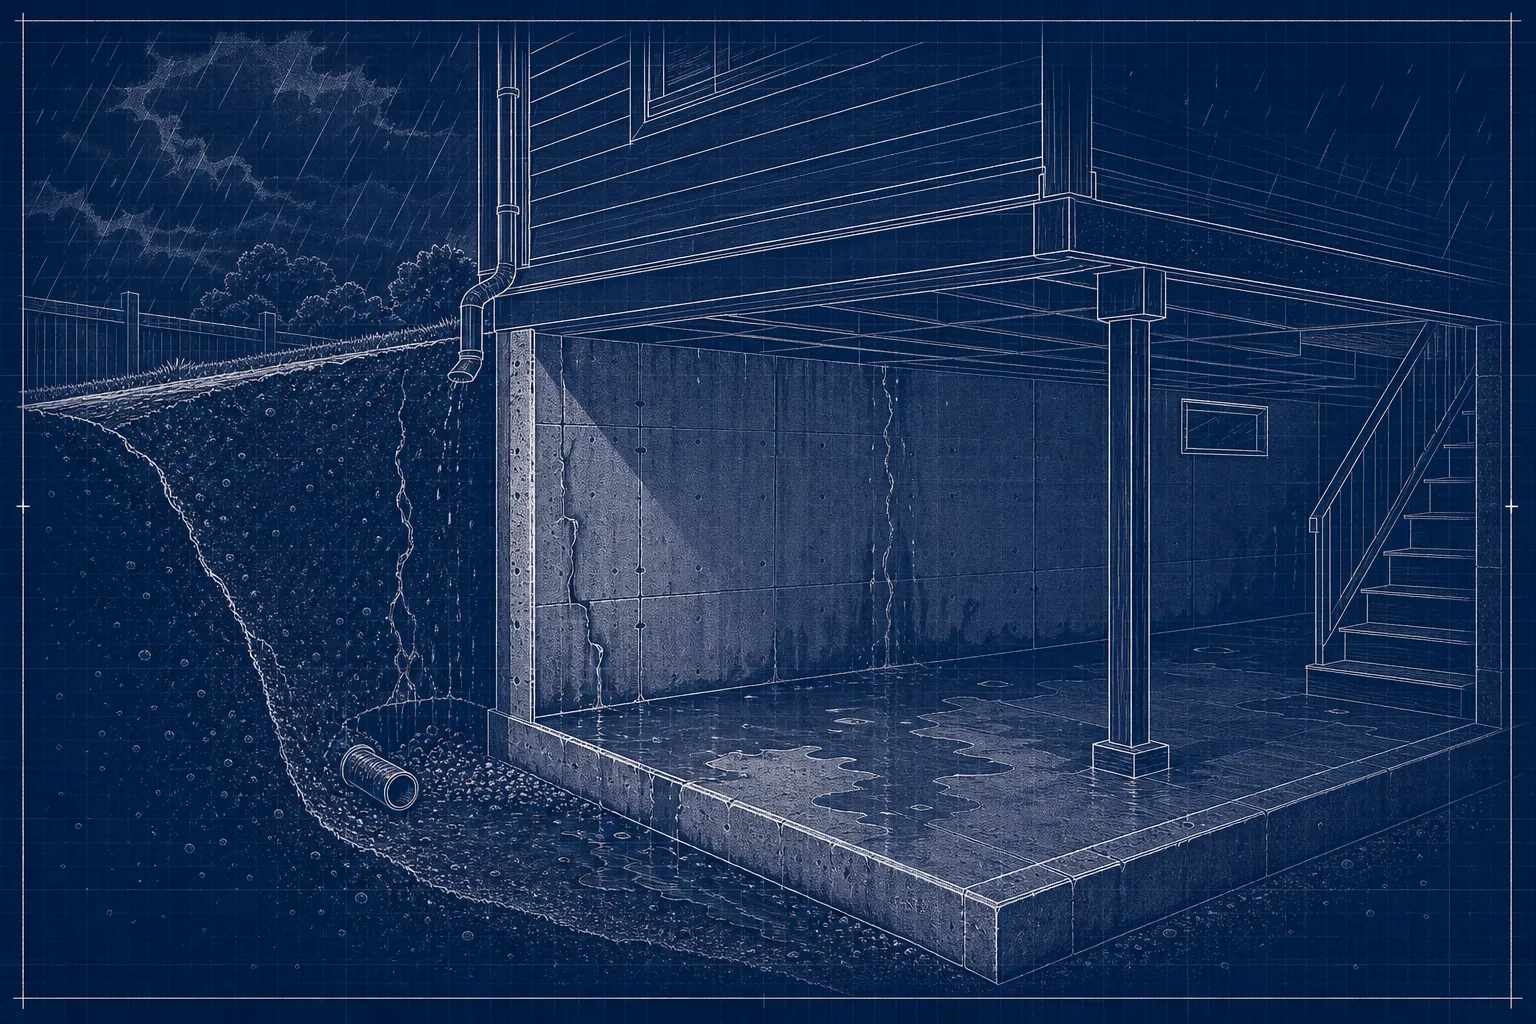

Basement leaking in New Zealand is almost never a one-off event. The conditions that drove water in the first time, saturated ground, clay-heavy soil, hydrostatic pressure, are still there after the water stops dripping, and they push right back in during the next rainfall. A basement leak commonly starts small, gets ignored, and eventually becomes a serious repair bill. In this article we offer a practical framework to identify the cause of your basement leak, how to check the site yourself, and then make an informed decision about how to fix it properly.
Why Auckland homes are especially prone to basement leaks
Auckland's situated in one of New Zealand's wetter regions and receives well over 1,000 millimetres of rainfall annually according to regional climate data. Much of this precipitation falls during sustained winter events. Large areas of the city are also underlain by clay-rich volcanic soils that drain slowly. That combination creates a persistent problem: water saturates the ground around basement walls and floors, builds pressure, and eventually finds a way in through the path of least resistance. Unlike a dry-climate home where surface runoff disperses within hours, an Auckland basement is often battling active groundwater pressure for days after the rain stops.
This is not a problem limited to old villas or properties built before modern standards. Even newer builds can develop leaks if the waterproofing system was not properly specified for the site conditions, or if detailing around joints, penetrations, and slab edges was inadequate during construction.
Hydrostatic pressure and what it does to basement walls
Hydrostatic pressure is simply the force that water-saturated soil exerts against a structure. When the ground becomes saturated after prolonged rain, the trapped water has nowhere to go and begins pressing laterally against foundation walls and upward through the floor slab. The pressure increases with depth, meaning the base of the wall takes the greatest load. Cracks, construction joints, and thin spots in the concrete become the path of least resistance. Even hairline openings that were watertight under dry conditions can start letting water through once pressure builds behind them.
Clay soils and site drainage failures
Clay holds water rather than allowing it to drain through. After a heavy rainfall event, clay-rich soils can remain saturated and pressurized for 24 to 72 hours, keeping constant pressure against the basement shell long after the rain has stopped. Site drainage failures compound this significantly. Ground that slopes toward the house rather than away from it, gutters that overflow near the foundation, and downpipes that discharge within a metre or two of the wall are all common contributors. On Auckland's hilly suburban sections, sloped topography can channel large volumes of surface runoff directly toward the lowest point of the site, which is often where the basement sits.
Cracked concrete and degraded waterproofing systems
Concrete is not inherently waterproof. Foundation walls crack through shrinkage during curing, settlement over time, and movement from seismic activity. Each of those cracks is a potential water entry point once hydrostatic pressure is present. Older homes in Auckland were often built with no external waterproofing membrane at all, relying on concrete thickness that was never adequate on its own. Newer homes are not immune: poorly detailed installations, membrane failures at corners and joints, and inadequate protection of the membrane during backfilling can all create the same result within a few years of construction.
Warning signs of a basement leaking in NZ
Identifying a basement damp problem early almost always leads to a cheaper, less disruptive repair. The signs are usually present well before the situation becomes critical, and reading them correctly tells you a great deal about how long the problem has existed and how active it currently is.
What to look for inside the basement
Efflorescence is one of the clearest indicators of ongoing water movement through a wall. Those white, chalky deposits on concrete or masonry form when moisture carries dissolved salts through the structure to the surface, where the water evaporates and leaves the minerals behind.
Efflorescence that returns after cleaning, or that traces the line of a crack or mortar joint, points directly to an active ingress path. On an established basement wall, persistent efflorescence means the water source has been active long enough to keep supplying moisture, not a one-time event.
Beyond efflorescence, look for damp patches and wet corners, water tracking along the wall-floor joint (the cove joint is one of the most common leak points in any basement), and rust staining or spalling concrete near embedded rebar. Mould growth, a persistent musty odour, blistering paint, and warped skirting boards all indicate chronic moisture that has been present for months rather than days. These secondary signs matter because they tell you that by the time the problem is visible, it has already been developing for some time.
What to check outside the house
Walk around the exterior of the building after a rain event and observe how water is behaving. Check whether the ground slopes toward the foundation or away from it, inspect gutters for blockages and overflow points, and confirm that downpipes discharge at least two metres from the basement wall. Window wells without functional drains and raised garden beds built directly against the foundation wall are two often-overlooked contributors to foundation wall leaks in New Zealand. A symptom that appears or worsens during rainfall almost always points to surface water or groundwater ingress rather than internal condensation, an important distinction when selecting the right repair method.
How to find where a basement leak is coming from
Matching a specific exterior defect to a specific interior wet point is the most reliable way to identify the leak source. Guessing at the cause and applying a patch without this diagnosis is one of the costliest errors a homeowner can make, because the wrong fix buys very little time before the problem returns.
Reading the pattern: rain, dry weather, and condensation
The timing and conditions of a leak reveal its source more clearly than the wet patch itself. A leak that appears within a few hours of heavy rainfall almost certainly traces back to surface water or hydrostatic pressure from saturated soil. A leak that appears gradually during dry weather may indicate a plumbing issue or rising damp from below the slab. Moisture that appears consistently during warm weather without any rainfall event is more likely condensation caused by poor ventilation in the below-ground space. Before calling any contractor, document the pattern: when the moisture appears, where it appears, and what the weather conditions were at the time.
The hose test and moisture mapping
The controlled hose test is one of the clearest diagnostic tools available to a homeowner before professional assessment. Wet one specific exterior section at a time, starting at the lowest point and working upward, while someone watches the corresponding interior area for fresh moisture. When a specific exterior wetting produces a specific interior response, you have identified the entry path. A moisture meter helps confirm hidden damp areas behind painted or lined walls that look dry on the surface. For hidden or complex leak paths, professionals use dye or tracer testing and borescope inspection to trace water movement without opening up walls unnecessarily.
How to fix a basement leaking in NZ: repair options and typical costs
The right repair method depends on where water is entering, how much pressure is involved, and whether the goal is a targeted fix or a full system solution. Surface-applied sealants used without addressing the underlying source often provide only short-term relief before the same pressure opens the same path again.
Polyurethane crack injection for active leaks
For foundation wall cracks that are actively letting water through, polyurethane injection is the standard targeted repair. A resin is injected under pressure to fill and seal the crack from within, expanding to close off the water pathway. This approach is priced as a remedial repair job rather than per square metre, with the total depending on crack length, access, and preparation. In New Zealand, costs typically range from NZ$500 to NZ$1,500 per crack for straightforward polyurethane injection work, with more extensive resin repair programs running NZ$4,000 to NZ$15,000 for larger or more complex scenarios.
Membrane and tanking systems
For comprehensive basement waterproofing in NZ, membrane and tanking systems are the preferred solution. Exterior excavation and membrane installation is the most thorough approach because it stops water before it ever contacts the structure, but it involves significant site work and cost. Interior tanking membrane systems are more accessible for existing homes and are applied to the inside face of basement walls and the floor slab, creating a barrier that resists inward water pressure. In New Zealand, membrane work for basement and below-ground applications is typically priced in the NZ$80 to NZ$150 per m² range, with substrate condition, access constraints, and required detailing all affecting the final number. A properly specified and installed interior tanking system is expected to achieve a serviceable life of around 50 years under New Zealand Building Code durability requirements.
Interior drainage and sump pump installation
On sites where exterior excavation is not viable, a perimeter drainage channel combined with a sump pump provides an effective long-term solution for managing basement groundwater. Water that would otherwise enter the basement is intercepted by the drainage system and directed to the sump, where it is pumped away before it can cause damage. A sump system manages water rather than stopping it at the source, which makes it most effective when used alongside other repair methods on sites with ongoing hydrostatic pressure from high groundwater or persistently saturated clay soils.
When to stop DIYing and call a waterproofing specialist
Some basement moisture problems are within a capable homeowner's reach: clearing blocked gutters, improving site drainage, and sealing minor surface cracks with appropriate repair compounds are all reasonable first steps. Most basement leaks in Auckland, however, have an underlying cause that needs engineered repair. Applying a DIY patch to that kind of problem delays the correct fix while damage continues to accumulate.
Jobs that go beyond a weekend fix
Certain situations require a specialist without exception: active structural cracks, water entering through the slab, leaks in basement rooms used as living space, and high hydrostatic pressure sites all fall into this category. Under the New Zealand Building Code, particularly Clause E2 (External Moisture) and Clause B2 (Durability), significant waterproofing work on below-ground spaces often requires building consent and a specific engineering design. Unlike above-ground wet areas, there is no prescriptive Acceptable Solution for basement tanking in New Zealand, which means the work is treated as an alternative solution requiring specialist design and documentation. Auckland Council expects that work to be properly consented and checked for compliance before it proceeds.
What a proper professional assessment covers
A qualified waterproofing contractor's site assessment should include a systematic inspection of both interior and exterior conditions, moisture testing to confirm active and historical ingress zones, identification of the specific entry point and its cause, and a written recommendation that clearly distinguishes between short-term and permanent repair options.
CCR Waterproofing takes that approach on every site visit. As an Auckland-based specialist covering the full range of causes discussed in this article, the team handles leak diagnosis and repair under one roof. Homeowners avoid the need to coordinate separately between a builder, a plumber, and a waterproofing subcontractor on a problem that calls for a single, integrated solution. When evaluating any contractor, ask specifically about their product systems, their workmanship warranty, and their hands-on experience with below-ground waterproofing before committing.
Next steps for a basement leaking in NZ
A leaking basement in New Zealand is almost always a fixable problem once the source is correctly identified. Work through the process in the right order: look for the warning signs, read the leak pattern before assuming the cause, get a professional diagnosis before spending money on repairs, and choose a contractor who specialises in basement waterproofing rather than a generalist who handles it occasionally. If you are dealing with a basement leaking in NZ, whether in Auckland's inner suburbs or further out across the region, the first step is always an accurate diagnosis.
Skipping straight to a surface patch without proper diagnosis is how homeowners find themselves repeating the same repair every few seasons. A properly specified repair matched to the actual site conditions, and backed by a workmanship warranty, is a far better investment in your property. Basement leak repair in NZ done right the first time costs less over the long run than a cycle of short-term fixes.
If you are dealing with a wet or damp basement anywhere in the Auckland region, get in touch with the CCR Waterproofing team to arrange a site assessment. The team will give you a clear picture of what is happening and what it will take to fix it properly.